Assigning Bib Numbers
THIS_HELP_ARTICLE_URL: https://raceapp.nethelp/assign-numbers
Once you have created a meet, you can assign bib numbers to each athlete.
The system will assign a 4 or 5 digit bib number to each athlete for a meet – remember these numbers are per meet. This process must be done again for every meet you host.
These bib numbers are in addition to QR codes. You can print these numbers on anything you like or even just have athletes write them on their hands. We like using Tyvek wristbands. Then, when you enter results you can type in the bib number or scan in handwritten results with the bib numbers and the system will automatically fill in the athlete’s info for you.
Be sure to checkout the tips section at the bottom of this page.
Assigning Bib Numbers
- First make sure all your athletes and guest athletes have been entered into the system.
- Navigate to your meet
- Select ‘Assign Bib Numbers’
- Add any other teams attending. If the team is in RaceApp, their name will auto-populate in the drop-down.
- Click ‘Import Athletes & Assign Numbers’
- Note that each team will have it’s own prefix. For example, all athletes from ‘Team A’ will start with
1and all athletes from ‘Team B’ will start with2. This makes it easier to spot-check results as you write them down (if you are not using printed labels).
Custom Starting Numbers
If you need more control over bib numbering, open the Bib Numbering Settings panel on the Assign Numbers page:
- Meet-wide starting number — Set a single starting number (e.g.,
100) and all athletes across all teams will be numbered sequentially: 100, 101, 102, etc. This is useful when you want simple, short bib numbers. - Per-team starting numbers — Override the starting number for individual teams. For example, set Team A to start at
100and Team B to start at500. Each team’s athletes will count up from their starting number. - After saving settings, click Re-Assign Numbers to apply the new numbering scheme.
- Priority: Per-team overrides take precedence over the meet-wide setting. If neither is set, the default prefix scheme (1001, 2001, etc.) is used.
Editing Individual Bibs
You can change any individual bib number directly on the Assign Numbers page:
- Click on any bib number in the athlete list
- Type the new number (1-6 digits)
- Press Enter or click OK to save
- Press Escape or click X to cancel
The system will prevent duplicate bib numbers within a meet. Changes are saved immediately — no need to reload the page.
Using Pre-Printed Bibs
If your athletes already have numbered bibs from a league, a vendor, or reusable race numbers:
- Open Bib Numbering Settings and set each team’s starting number to match their bib range
- Click Re-Assign Numbers to apply
- For any athletes whose bibs don’t match the sequential pattern, click their bib number to edit it individually
RaceApp’s timing, results entry, QR codes, and scoring all work with whatever numbers you assign — they don’t have to follow the default scheme.
Printing Bib Numbers
You have a few options for printing out the numbers.

- Recommended: Print the team rosters and bring it with you to the meet.
- Each team will be broken into a separate page when printing.
- This makes it convenient for sharing with other teams.
- You should definitely do this as a back-up even if you are also printing labels.
- If not using printed labels, you can write these numbers on Tyvek with permanent markers.
- PROS:
- Durable - Wristbands with permanent markers are nearly indestructible.
- Cheap - less than a couple cents each when purchased in bulk.
- Less set-up - Give out the roster with assigned bib numbers to each team and let them write the numbers on the wristbands or their hands themselves.
- Pretty quick for Track races - We have found it pretty efficient to have 1 volunteer race recorder hand write down numbers and times on paper, then hand off that paper to a 2nd volunteer to enter the results while the next race starts. If you do this,
pick a volunteer with excellent handwriting!
- CONS:
- Manual - You must have a volunteer punch in the numbers manually into the system or write it on paper for later scanning by our handwriting recognition.
- Less accurate - Scanning in handwritten results or manually typing them in leaves more room for human error. Manual errors
will happen, so be ready. Look for as many ways as possible to remove opportunities for human error when recording your results.
- PROS:
- Optional: Print out all the names as labels.
- This will generate a PDF available in several label sizes including the
Avery 8160template. - These work great when attached to Tyvek wrist bands - the labels stay put but are still removable. We have not had any problems even though they are a little wider than the wristbands.
- PROS:
- Accuracy - Having the QR codes as the primary input is
the most accurateway to scan in results. It takes out the human factor of trying to recognize bad handwriting or mistyping manual entries. - Peel-n-stick - For single-race events like Cross Country, you can peel the labels off the athlete’s wristband or jersey and apply them directly to a results sheet for later scanning.
- Redundancy - These also have bib numbers and names as back-up or alternative ways to input results.
- Accuracy - Having the QR codes as the primary input is
- CONS:
- Small added cost of printing labels, but just a couple cents each.
- Potentially less durable. A standard mailing label such as the Avery 8160 will be a little less durable. However, this can be overcome by using a waterproof vinyl stickers printed on a laser printer. Here is an example that is only 1.3 cents per label for waterproof vinyl.
- You may not care about QR codes anyway. In a track meet where athletes do multiple events, you may find it faster to hand record the bib numbers and then scan in an entire race at once rather than manually scanning the QR code of each athlete at the finish line.
- PROS:
- This will generate a PDF available in several label sizes including the

- Optional: Print Half-Sheet Race Bibs (2 per 8.5x11 page).
- A traditional pinned-on race bib with a giant number, the athlete’s name, team, and the meet name/date.
- Corner dots mark where to put safety pins.
- Available in two versions: plain, or with a QR code on the right for finish-line scanning.
- PROS:
- Familiar format — looks like the pinned-on bibs you see at road races and invitationals.
- Numbers are big enough to read from across the track or finish chute.
- Easy to distribute — cut the page in half and hand them out.
- Great for cross country or larger track meets, where large visible bibs are standard.
- If you record a video backup of the finish line you can figure out athletes from their numbers visible on the video. This really enhances the usefulness of the backup videos.
- CONS:
- Uses more paper and toner than labels.
- Requires safety pins rather than wristbands.
Managing Guest Athletes:
- At the bottom of the same page is your list of guest athletes.
- Use this section to assign numbers to new athletes during a meet.
- This happens very frequently. Coaches may give an incomplete roster or have a last minute addition. This is no problem!
- Scroll to the ‘Guest Athletes’ section and click ‘Add New’.
- Enter the athlete’s information and save.
- Their name will now be in the table, sorted alphabetically.
Tips:
- Use Tyvek wristbands (optionally with printed labels)
- We love these and have used them at many meets. They cost less than 2 cents each.
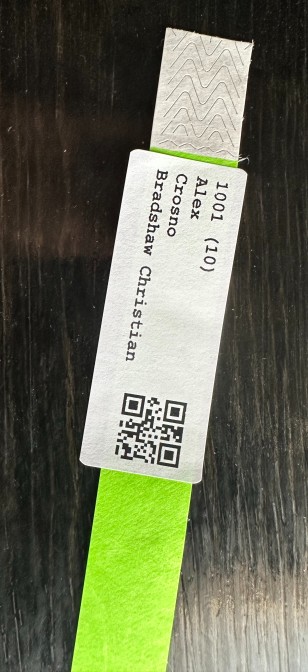
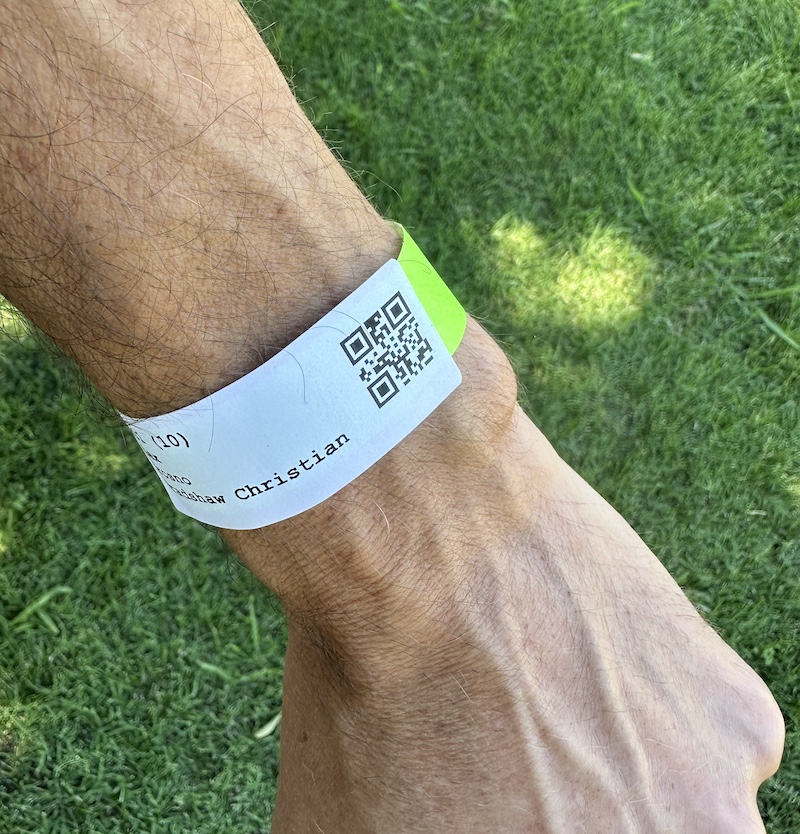
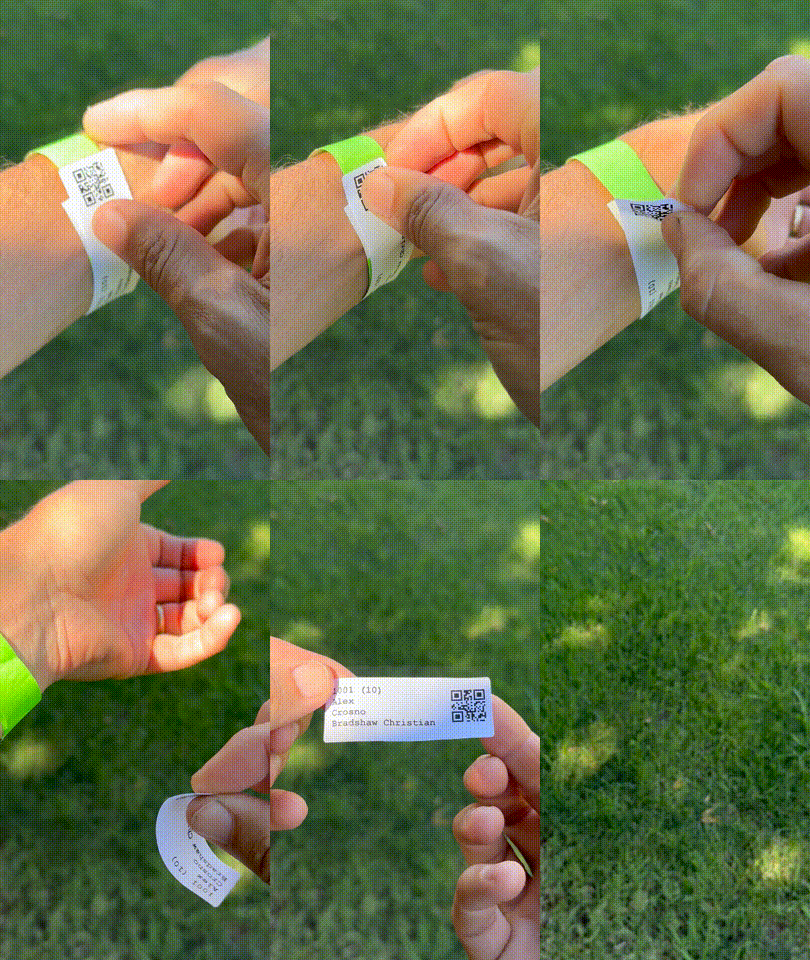
- Print out the list of bib numbers and bring it with you to the meet.
- If you don’t print the labels, have athletes write their bib number on a wristband using a permanent marker.
- If you do use the labels, have the athletes apply them after putting on the wristbands!
- They are brightly colored and therefore easy to verify every athlete is ready to go before each race.
- We love these and have used them at many meets. They cost less than 2 cents each.
- Handling late entries:
- It will happen every meet. Roll with it.
- At your coaches’ meeting, tell the coaches to send any athletes missing bib numbers over to you right away so you can enter them in the system.
- The system will add bib numbers sequentially. You can use this to your advantage. If there is a group of athletes waiting, do this:
- Find the last guest athlete’s bib number that is already entered in the system. For example,
5003- you now know the next athlete entered will be assigned5004. Guest athletes will all have the same number prefix, i.e.5in this example. - Write down each athlete’s info on a piece of paper and assign them the next sequential bib number - just write it down next to their name
- Write down the number on a new wrist-band and give it to them
- Once you’ve taken care of all the waiting athletes, now go back into the system and add them in as new guest athletes. Be careful to enter them in the same order so that the assigned bib numbers are correct.
- It’s helpful to have 2 volunteers managing your check-in table.
- One can write down names while the other enters the data into the system.
- Find the last guest athlete’s bib number that is already entered in the system. For example,
Next: Record times for a race