If you’ve been reading through posts like My Complete Track Meet Kit or DIY FAT Timing Setup and feeling overwhelmed — don’t be. Those describe what my kit has evolved into after years of running meets. You don’t need all of that to get started.
Below I’ll walk through different setups from the absolute bare minimum to full production, for both track and cross country. Each level builds on the last, and each one gives you something real.
Track
Level 1 — Just Your Phone
Gear: An iPhone or iPad you already own.
It’s not ideal, but it works. Stand at the finish line and hold your phone aimed perpendicular to the finish. You can use the hand timer built into the RaceApp web app, or do a manual start with the FAT app on an iPad - and still way more accurate and consistent than multiple people with stopwatches.
You’ll get times that are good enough for a dual meet, and results go live online immediately. The downsides are obvious — no automatic start, shaky camera, and it’s hard to see all the lanes from ground level. But if you’re just getting started, this costs you nothing.
Level 2 — iPad on a Tripod
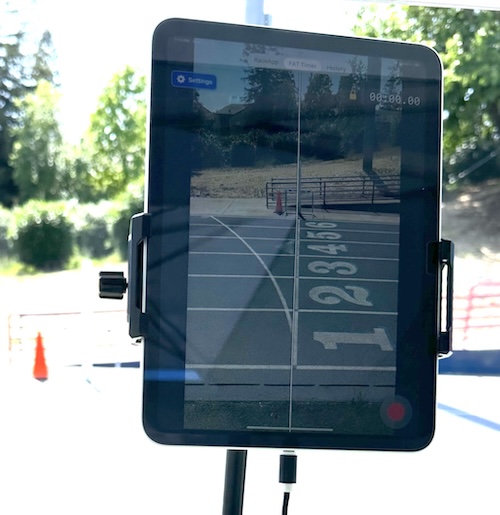
Gear: iPad + a tripod.
This gets you pretty far. The bigger screen makes reviewing finishes way easier, and you’re not fighting to hold the camera steady anymore. Throw in a taller tripod and a step ladder to get a better angle across all the lanes.
You’re still doing a manual start at this level — you tap when you hear or see the gun (or see smoke). But the stability and screen size alone make a big difference in how confident you feel about the times.
Level 3 — Basic FAT Timing
Gear: iPad, tripod, wireless microphone + a second tripod for the mic.
Adding a wireless microphone is the step that makes it real FAT timing. The mic picks up the starter’s gun and the iPad starts recording automatically — no more guessing when to tap.
We’ll send you a free mic kit with any new $99 FAT subscription.
Here’s the basic workflow:
- Before the race: Enter athletes by lane on a second phone using the web app.
- At the start: Your starter carries the wireless mic on a tripod to the starting line.
- Gun goes off: The iPad FAT app auto-starts the race.
- At the finish: Tap stop, then review the captured footage. Mark each runner’s finish time and lane.
- Tap Export: Results with times are immediately live for spectators.
- Rinse, repeat for the next race.
That’s it. You’re now producing actual FAT times — the same standard used at every level of competitive track. For more on the hardware, see DIY FAT Timing Setup and How to Desensitize Your Mic.
Level 4 — Full Pro Flow with Remote Review
Extra gear: A second iPad, laptop, or anything with a web browser.
This is where big meets get fast. Turn on the iPad’s built-in local webserver and connect a second device. Now a helper can review and mark finishes on their screen while the iPad operator is already setting up the next race. You’re never waiting on marking to start the next heat.
One networking note: The video stream from the iPad to the browser is a little demanding. If you’re tethering to a phone’s mobile hotspot, pick up a ~$35 travel router to handle the traffic. If you’re on the school’s wifi or already have a dedicated hotspot router, you should be fine.
Level 5 — The Big Show
Extra gear: A large, bright monitor.
Hook up an external display to your laptop or an extra iPad and pull up the iPad webserver’s timer page. Now the crowd gets a live view of the running clock for every race. Combine it with a wireless PA system and you’ve got a meet that feels like a real production.
A note on connectivity: Levels 3 and up assume you have a way to share internet between your devices — a phone hotspot, school wifi, or a mobile router.
Cross Country
Cross country is simpler. It’s always hand timed — RFID chip timing gets complicated and expensive fast, and most school programs don’t need it. Here’s how to build up your XC setup.
Level 1 — Just Your Phone
Gear: Your phone.
Assign kids numbers before the meet. Put them on wristbands, adhesive labels, or just write them on their hands with a marker.
Start the hand timer from the RaceApp mobile web app at the gun. At the finish line, you have two options:
- Hand timer: Keep using the hand timer and press the Mark button as each runner crosses the finish line.
- Video Assisted Timer (VAT): Open the VAT in your phone’s browser and point your camera at the finish line. Press Mark for each finisher. A panorama image of runners crossing the line gets saved to the live results page so spectators can see the action.
Have a helper in the finish chute writing down bib numbers in order, or collecting labels if that’s what you used. Then use your phone to enter the numbers manually, or snap a photo of the handwritten sheet and let our OCR scanner import them.
That’s a complete XC timing setup with nothing but your phone.
Level 2 — iPad on a Tripod + QR Labels
Gear: iPad + a tripod.
Instead of just assigning numbers, print out mailing labels with QR codes and each athlete’s name. Athletes can stick the label on their jersey, or keep the backing on and safety pin it for easy removal in the finish chute.
Start the race from your phone at the starting line, then head to the finish and use the iPad for the VAT — the bigger screen and tripod stability make marking finishers much easier than doing it on a phone.
At the chute, your helpers collect the QR labels and stick them in order on a piece of cardboard. Then you or another helper scan the QR codes with the RaceApp mobile web app. It’s fast — you can scan in a 50+ kid race in about 90 seconds.
Tip: Add a keyboard. Pick up an inexpensive wired number pad (~$10) or a Bluetooth keyboard to use with the VAT. A physical button is much more reliable than tapping the screen when runners are pouring through the finish, and you get tactile feedback so you’re not second-guessing whether you hit it. I prefer a simple wired number pad — small, light, no batteries to worry about. Bluetooth works too, with the added benefit of keeping your iPad’s port free for a charger on long meet days. The RaceApp VAT page responds to a variety of keyboard inputs, so either type works.
Start Where You Are
You don’t need to buy everything at once. Start at whatever level makes sense right now and move up when you’re ready. Every level gives your athletes real times and your spectators live results.
And unlike hiring a timing company at $600-1000 per meet, once you have the gear you can use it at every meet all season — home or away.
| Get started free | See pricing |